Combining photography and overnight hiking has become an integral part of my workflow over the pass year. The gallery is now littered with scenes taken many kilometres away from the mark of a car tyre, or sound of a plane overhead. It’s the total immersion within the landscape that I find so appealing, even if its just for a night or two. The divide between myself and nature fades away, and I’m left in my original state. With minimal distractions I can concentrate with precision, on whats before me, or quietly relish the “boredom” of simply being.
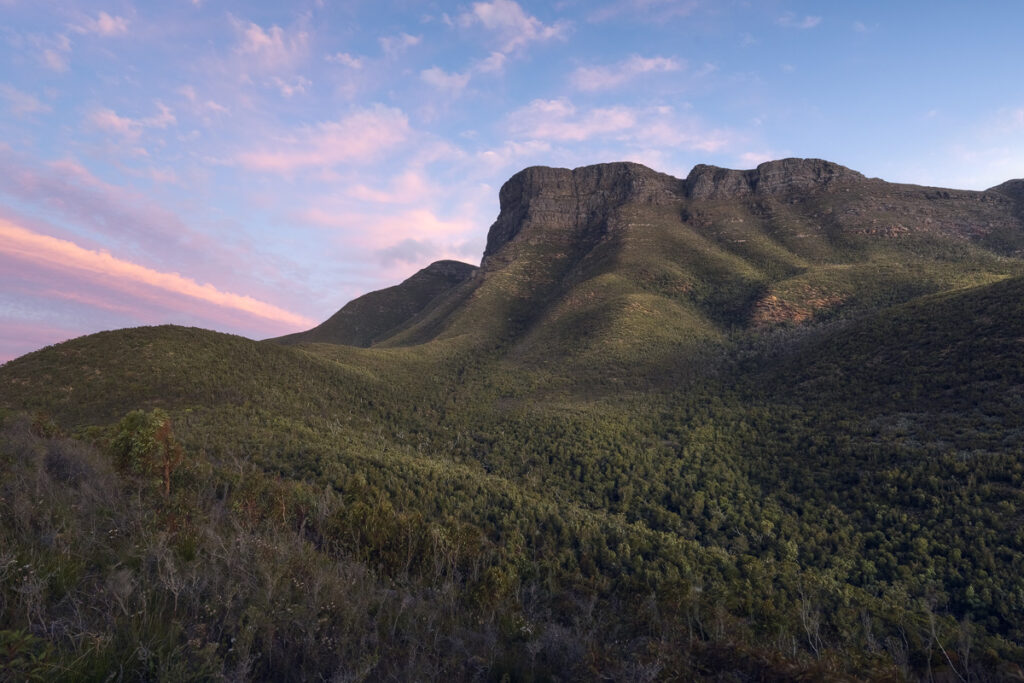
The Stirling Ranges in WA boasts a 60km stretch of untouched wilderness. It’s peaks demand attention on the drive in, rising 1100m out of nowhere. In winter, the ranges are dusted in snow… Not the usual landscape that comes to mind when one thinks of Western Australia! Upon my arrival, I was greeted with glorious high-level cloud. The type that lights up pink when the sun drops below the horizon. Despite the incredible wind gusts, I managed to snap a shot of Bluff Knoll from below… It was an exciting feeling knowing I’d be sumitting it the following day.
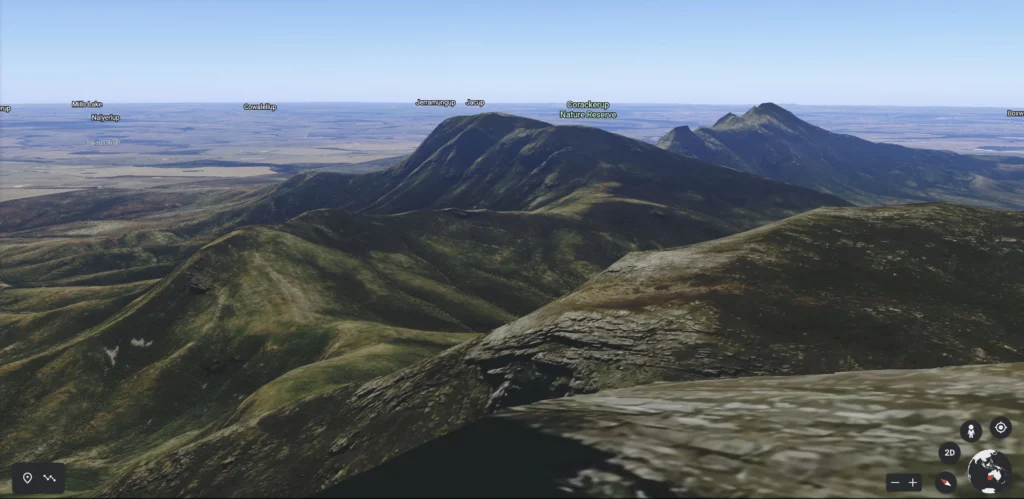
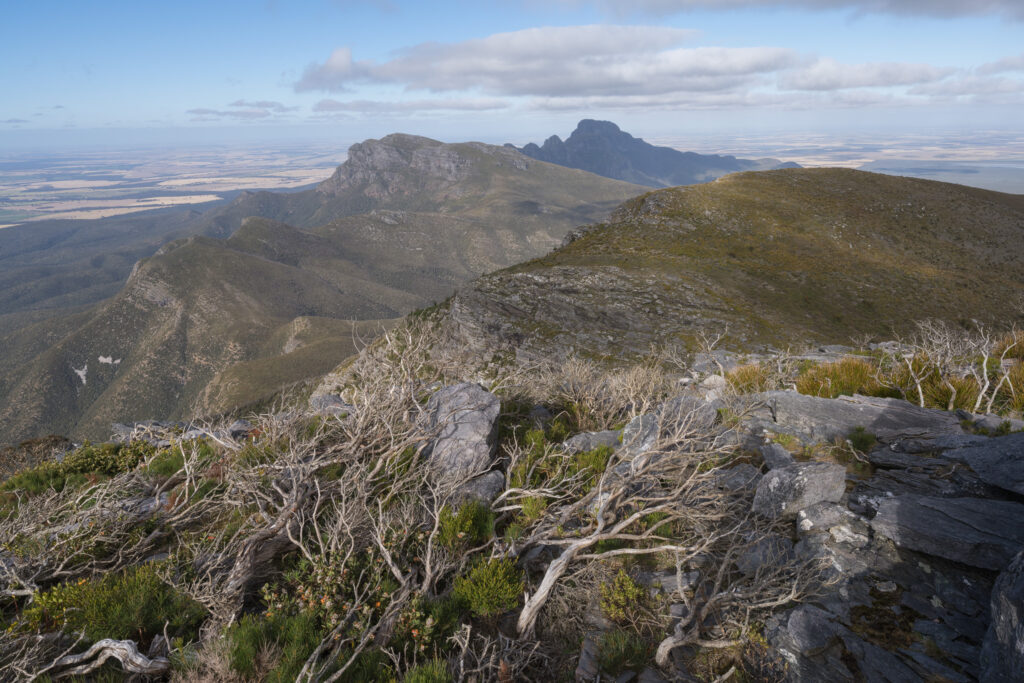
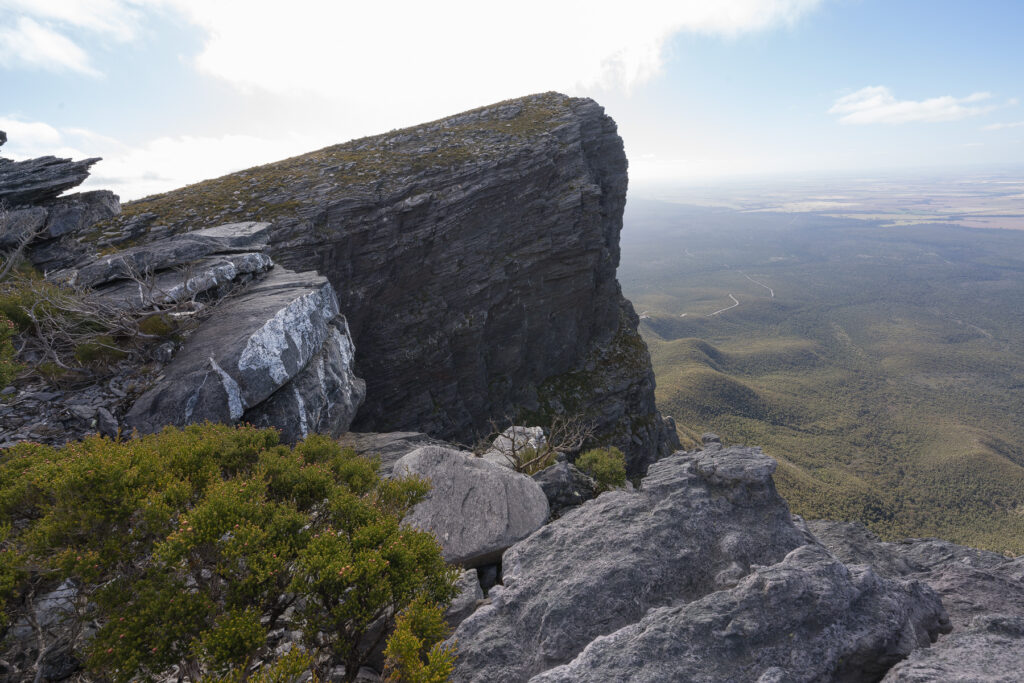
After 3 hours of a sweat inducing work, I found myself roughly 850m above sea level. The peaks before me were some of the best I’d seen on the mainland. Dappled light painted the land, as patchy low cloud flew pass overhead. Using my phone camera in wide angle mode, I began sussing out compositions. It was impossible to ignore the abundant wildflowers on the walk up, and I knew I’d like to include some in an image.
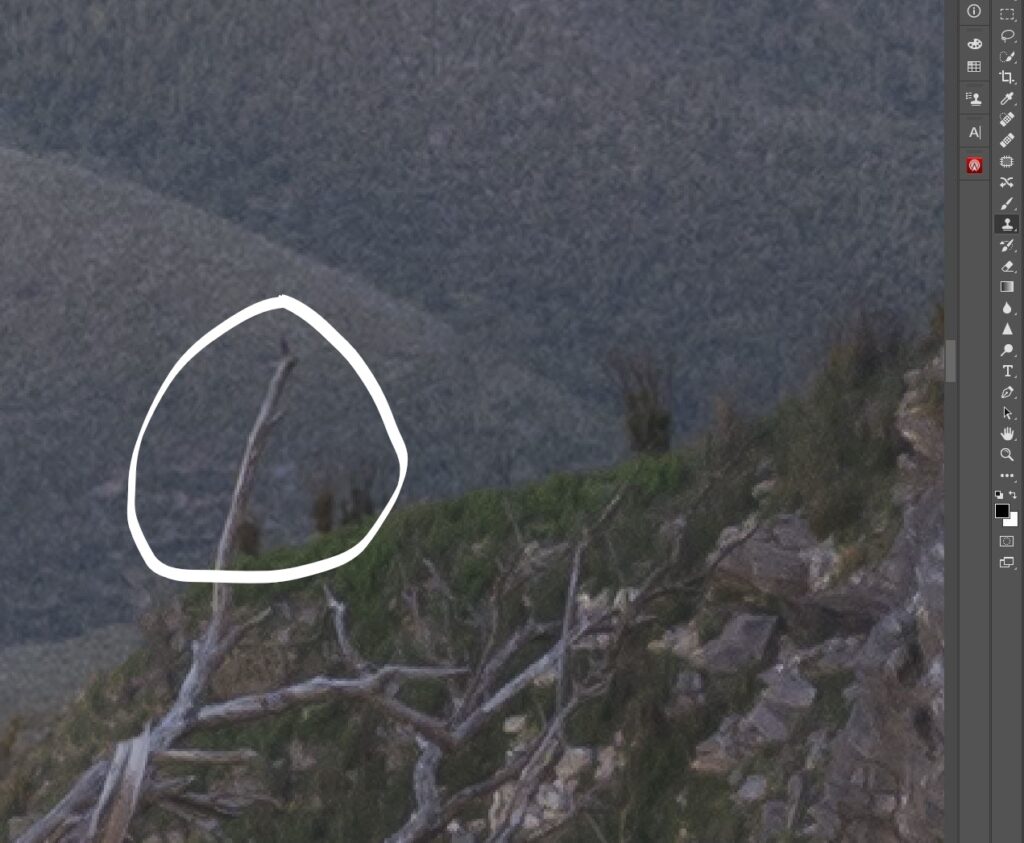
After setting up camp, I spent a good hour looking for a shot that might work. Generally, I’ll try to avoid pre-concieved ideas as they place me in a creative box… However, having a course of action can help! I began the hunt. It was an absolute struggle. Finding a small grouping of flowers seemed like an impossible task. High winds had brutalised the landscape. A strewn mess of fallen trees and boulders. After much deliberation, I settled upon a branch pointing at my intended subject (the distant mountains).
Processing
Processing & Background
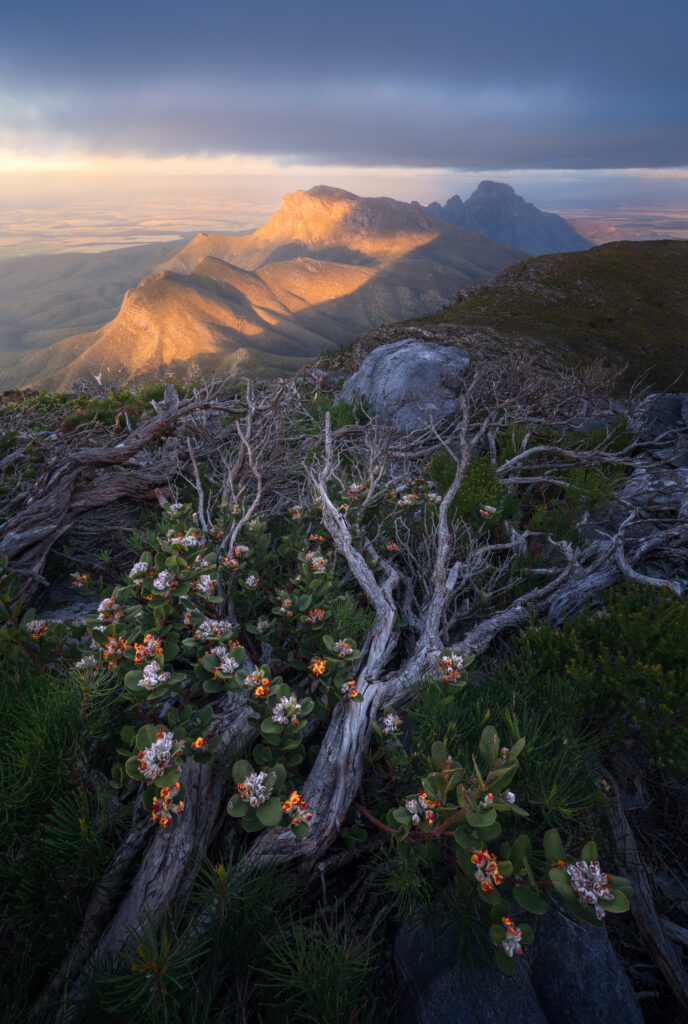
The final photograph is blend of four images. After setting up my tripod and dialling in a composition, it was simply a matter of relaxing and observing the light. By focusing on different elements throughout the scene, I was able to achieve a sharp image from front to back (despite only shooting at an aperture of F11). Helicon Focus was utilised for the focus stack. Unfortunately, the wildflowers in the foreground developed a faint halo (due to wind gusts between frames). This was easily cleaned up in Helicon via the retouching tool.
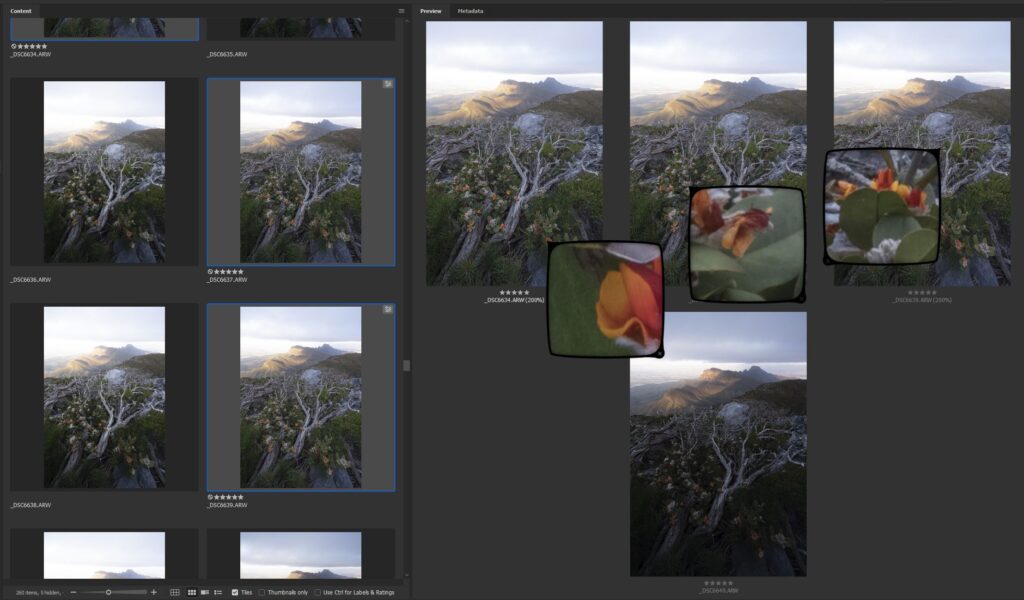
With the focus stacked foreground sorted, it was time to deal with the background. As previously mentioned, the camera was not moved. After shooting the focus stack, I sat back and enjoyed the view. Roughly 15 minutes later the light had dramatically changed, characterised by soft orange hues. Exactly what I was after. With a final snap of the shutter, the sun dipped below the horizon.
Bringing it Together
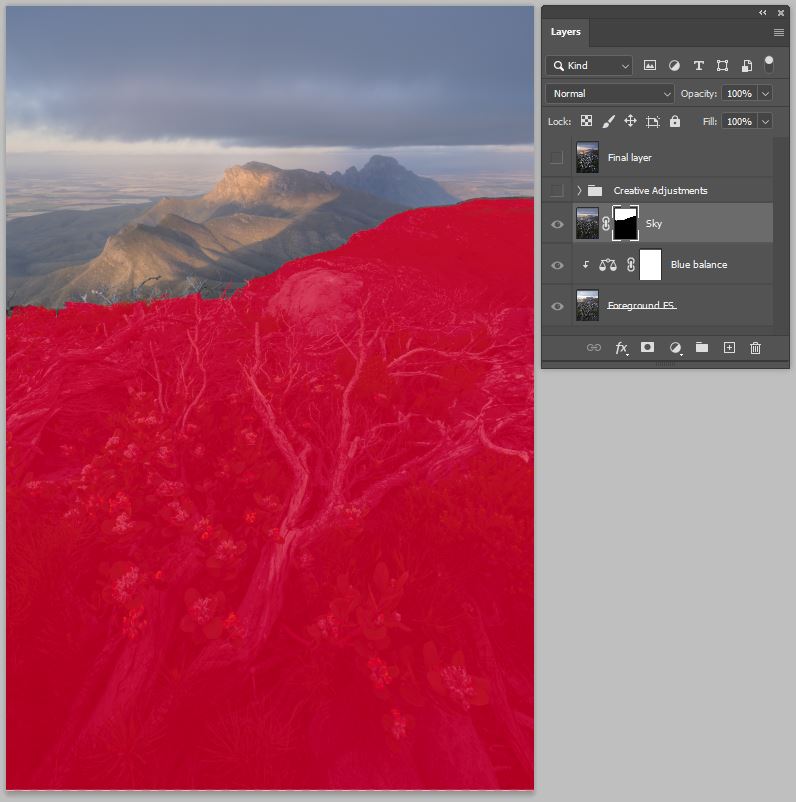
Global adjustments such as sharpening, noise reduction, white balance and contrast were made on both files. Next was bringing the focus stacked foreground and background together in Photoshop. This was done by hand using a Wacom tablet. The composition was shot with a hard transition between foreground and background, making the blend straight forward. A midtone colour balance layer was placed between them for a better colour match.
Creative Adjustments
Now for the fun part! The creative changes to the photograph were done at various stages. This process usually takes a few days, as my preferences change each time I re-visit the image. My overall aim was to enhance the existing light to something similar to what I saw on the day. With strong winds & dark, moody clouds the scene had an ominous feel to it. I wanted to convey this back to the viewer. I always shoot in RAW. This maximises the data collected by the cameras sensor, but produces flat files that need sprucing up!
Firstly, the distractions were removed using the Clone Stamp tool and Spot Healing Brush. Time was taken to slowly remove branches along the transition between foreground and background. This was achieved by zooming into 300%. Any brighter distractions (branches, rocks, rabbit poop) around the edge of frame were also removed.
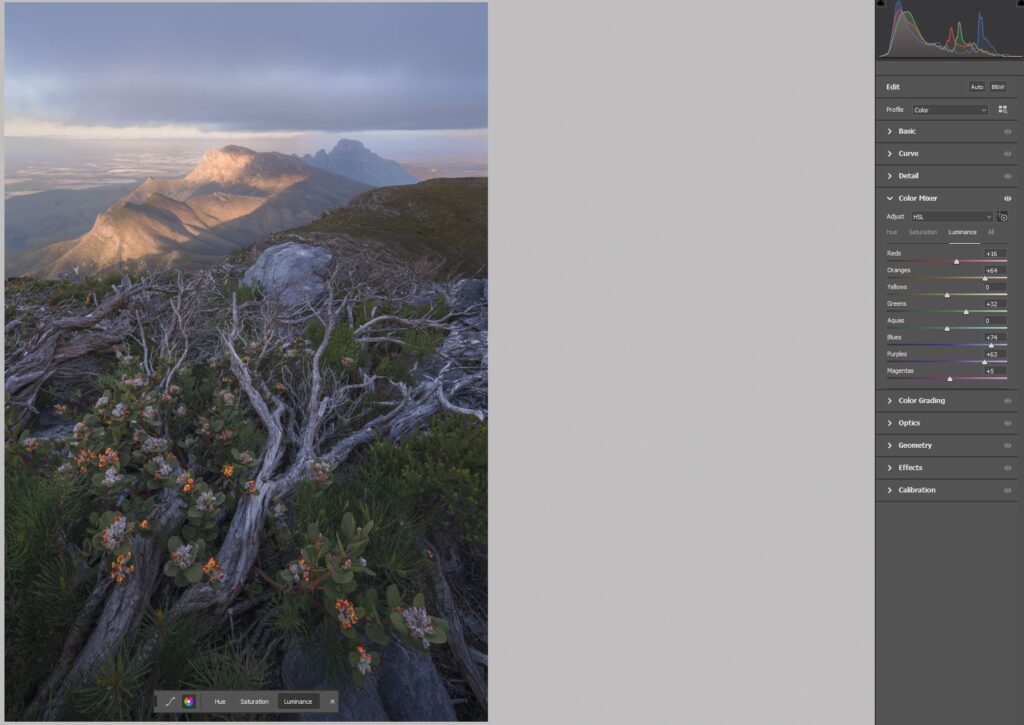
The wildflowers were then enhanced. I found them to be a little dull in the raw file, yet in real life they were very bright and demanded attention. A stamped layer was created, then opened in ACR. By navigating to the colour mixer tab, I increases the saturation and luminance. This modfied layer was then hand blended using layer masks in photoshop, showing only the flowers.
A number of contrast adjustments were made to the foreground. Details were retained in the shadows by using a blank layer in soft light mode. Black paint was added into specific areas to help guide the viewers eye through the scene. This is also known as “burning”.
The liquify tool was employed to stretch the mountains. I’d usually avoid doing this to my wide angle shots, however due to pin cushion distortion on the Sony 12-24mm GM lens, I felt this adjustment was necessary. The mountains dominated the horizon in real life, and my original aim was to bring back the same feeling to the viewer. Care was taken to ensure the horizon was still straight!

Next came the light enchantment. This was achieved by combing a warmed up radial filter with increased exposure and decreased highlights in ACR. A few blank layers (in soft light & overlay mode) were added back in Photoshop. Luminosity masks were generated in TK7 and utilised for the light painting on these layers. The details of this method are outside the breadth of this article. However, if you’d like more information feel free to shoot me a message! I’d be happy to expand.
The green leaves surrounding the wildflowers were then punched up using a levels adjustment layer in conjunction with a Lights 1 luminosity mask. By enhancing the existing light within the leaves, I was able to maintain a realistic effect.
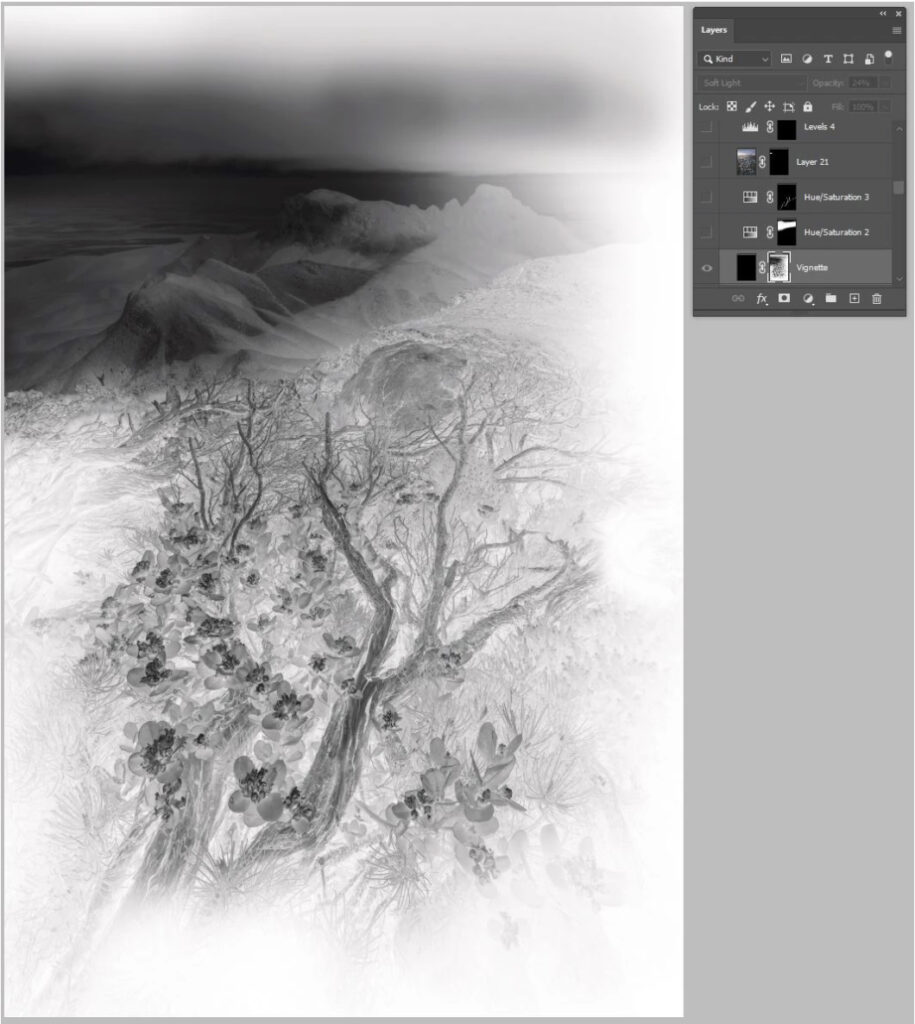
To create the darker mood I was after, a blank layer was added. It was filled with black paint, and switched to soft light mode. A white layer mask was added to the layer. It was then turned off, and a Lights 1 luminosity mask was selected. The layer was then switched on. With a low opacity soft brush, I was able to paint the brighter sections of the image that would be receiving light. I use this method often, as it produces a natural looking, highly customised vignette!
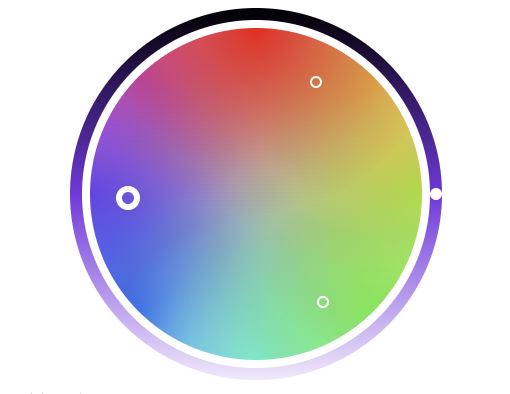
Finally, a number of colour adjustments were made to complete the editing. My aim was to create a more harmonious colour palatte. The hues in the background were shifted from yellow towards orange, and blue/cyan/magenta tones introduced into the shadows in the foreground. This pushed the scene closer to a triad colour harmony. Oranges on the mountains, greens in the foreground leaves, and deep blues/purples in the sky and shadows.
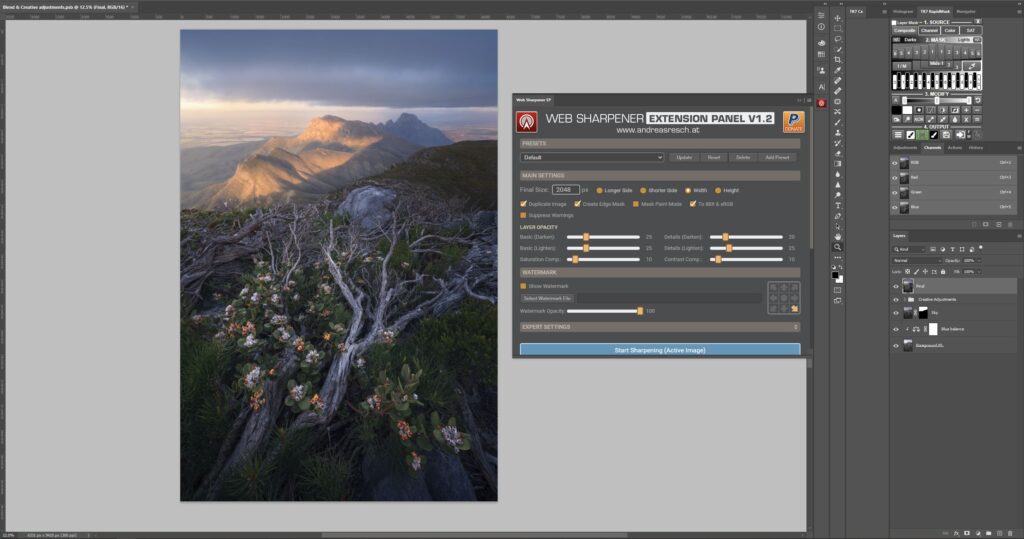
Web Sharpening
For web display, I use the Andreas Resch extension panel. This popular plugin makes resizing/sharpening for the web a breeze. The final layer was resized at 2048px along the longer side. I found the image to be quite crunchy upon output, so chose to stamp the layers and apply a Gaussian blur. I selected an output of 0.3 and adjusted the layers opacity to 39%. Using a white layer mask, I painted black in the areas that required full detail (the flowers and foreground branch). Finally, the image was exported.